TeamViewer installation guide
Add a new user
- If a user does not already have a TeamViewer account associated with their email, click the +User icon and click Add User.
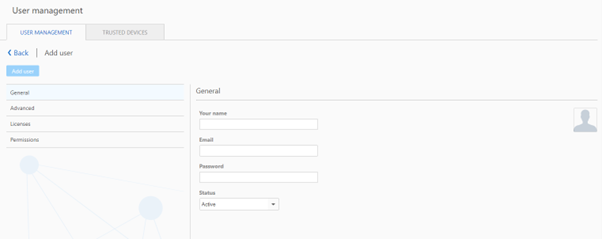
- You will create a TeamViewer account for them including email, username, and password that you can provide them with.
📌Note: You can set up further options in the menus Advanced, Licenses and Permissions.
📌Note: Once the account has been created via this method, an email will be sent to the new account to finally activate it. If this is not done the user will get an error that the account has not been activated when trying to sign in.
Add an existing account
- If they have a TeamViewer account already associated with their email, click Add Existing Account.
- This will provide you with a URL: https://login.teamviewer.com/cmd/joincompany. Simply give this URL to the user and have them log in with their free account credentials.
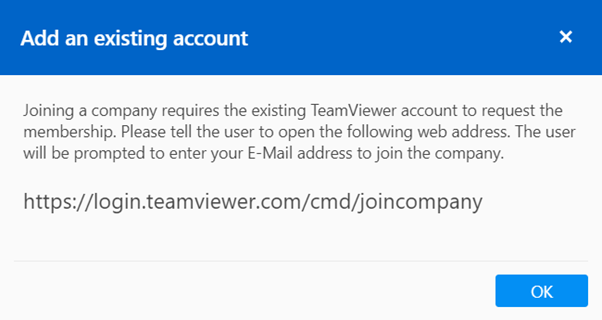
- Once they sign into their account, they must provide a Company Administrator email address.
- Once done, the administrators’ email that was entered will receive a request by email and as a notification in the Management Console under User Management which needs to be approved by the administrator. Once the user has been accepted, they are part of the company profile as a standard User.
📌Note: Please keep in mind that a connected account can only be removed from the company profile by the company administrator again and requires a valid license on the company profile/admin account. Also, the TeamViewer staff cannot remove the account on behalf of the owner of the associated email address or the company admin.
Set Permissions for users
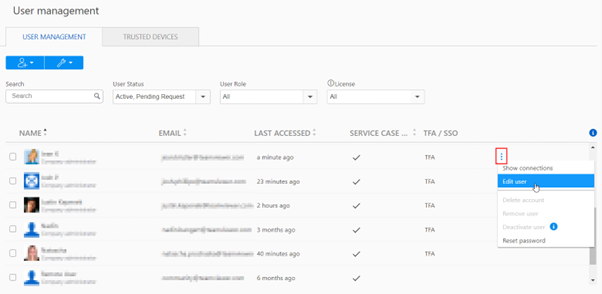
- Once you have your users added to your company profile you will also have the ability to set their permissions and promote them to Administratorsor Company Administrators:
- To promote the user, hover over their row in the User Management area. This will reveal on the right edge of the row the three-dots menu (⋮). Click this button to drop down a menu. When the menu appears, choose Edit User:
3. These are the different permission levels available:
-
- Company Administrator: Can make changes to Company settings, other Administrator accounts, and User accounts.
- User Administrator: Can make changes to other User accounts but cannot make changes to a company profile or Company Administrator account.
- Member: Only has access to connect to devices in their account. Cannot make changes to any other User accounts or Company profile settings.
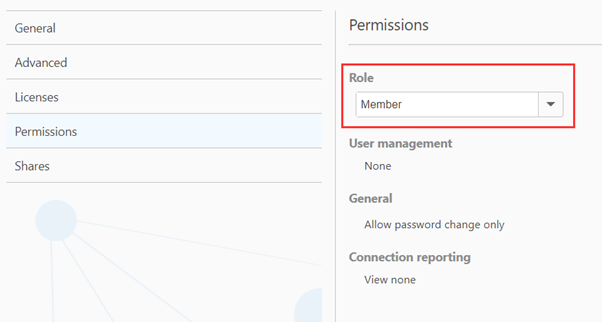
- Once the appropriate role is selected, move to the upper-left corner of the dialog, and click Save. The user now has the permissions that were selected.